
This article is part of the 7-part Testing LangGraph Applications series. The examples come from the langgraph-testing-demo repository.
Testing LangGraph Applications Series
- Stop Testing AI Outputs. Start Testing State
- How to Structure LangGraph Tests That Actually Scale ← You are here
- Testing Isn’t Enough: Evaluating LangGraph Workflows That Actually Work
- Testing Parallel LangGraph Workflows Without Losing Control
- Understanding LangGraph Workflows with LangSmith Traces and pytest
- Command vs Send in LangGraph: Choosing the Right Primitive
- What It Takes to Build Production-Ready LangGraph Systems
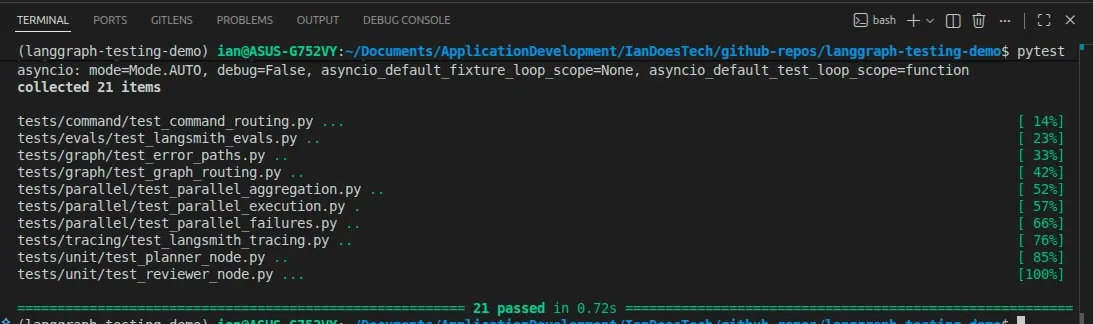
All examples in this article are backed by a structured pytest suite covering unit, graph, and failure testing layers:
In the previous post, we treated LangGraph workflows as state machines and focused on what to test.
Now the question is:
How do you structure your tests so they stay useful as the system grows?
Because this is where most projects quietly fall apart.
The Common Mistake
Most LangGraph test suites end up looking like this:
- Run the full graph
- Check the final output
- Repeat for a few inputs
Everything becomes an “integration test.”
At first, that feels fine.
But very quickly:
- Tests become slow
- Failures are hard to debug
- You don’t know which node broke
- Small changes ripple through everything
You don’t really have a test suite.
You have a slow demo script.
A Better Approach: Three Layers of Testing
Instead, structure your tests into three distinct layers:
- Unit tests (nodes) → logic in isolation
- Graph tests (behavior) → routing and state transitions
- Failure tests (robustness) → what happens when things go wrong
Each layer answers a different question.
Layer 1 — Unit Tests (Nodes)
Location:
tests/unit/These tests focus on individual nodes.
They should be:
- Fast
- Deterministic
- Easy to reason about
Each node behaves like a small function:
- Input → state
- Output → partial state update
For example, in tests/unit/test_reviewer_node.py:
result = await reviewer({"research": "Insufficient notes."})

assert result["review_status"] == "rejected"
This test tells you:
- The reviewer logic is working
- The node correctly identifies incomplete research
- The output contract is respected
You can also test edge cases:
- Missing input
- Retry limits
- Error conditions
Because these tests don’t run the full graph, they stay:
- Fast
- Stable
- Focused
Layer 2 — Graph Tests (Behavior)
Location:
tests/graph/test_graph_routing.pyThis is where you test the system as a whole.
Not the output quality — the behavior.
For example:
result = await graph.ainvoke({"user_input": "retry path example"})

assert result["review_status"] == "approved"
assert result["research_attempts"] == 2
This verifies:
- The reviewer rejected the first attempt
- The graph routed back to the researcher
- A second attempt was made
- The workflow eventually succeeded
This is powerful.
You’re not guessing based on output text — you’re verifying:
- State transitions
- Routing decisions
- System behavior over time
That’s the real value of LangGraph.
Layer 3 — Failure Tests (Robustness)
Location:
tests/graph/test_error_paths.pyThis is the layer most people skip.
It’s also the most important.
Here, you simulate failures using fake models.
For example:
- Researcher throws an exception
- Reviewer fails unexpectedly
And then you assert:
assert result["review_status"] == "error"
assert result["errors"] == ["reviewer failed: review service unavailable"]
What this guarantees:
- Failures are captured in state
- The graph stops safely
- Downstream nodes (like writer) are not executed
Without this layer, your system might:
- Silently fail
- Return partial or misleading results
- Be impossible to debug in production
This is where your test suite moves from “useful” to production-grade.
A Note on Graph Construction
The official LangGraph testing docs recommend a useful pattern for stateful agents: create the graph inside each test, then compile it with a fresh checkpointer for that test.
That matters most when you are testing checkpoint persistence, interrupts,
update_state, time travel, or resumable execution.
The demo repo keeps the default examples simpler because these graphs do not
use checkpoint persistence. The tests still build fresh graph instances inside
each test, and the graph modules expose uncompiled create_* helpers so you can
compile with a fresh checkpointer when a test needs that behavior.
A Quick Note on Async Testing
LangGraph supports both sync and async workflows. These examples use async graph execution because most real applications eventually call async model, database, or service APIs, and it keeps the tests close to production usage.
In pytest, that’s handled cleanly with:
@pytest.mark.asyncioThis allows you to:
- Call
await graph.ainvoke(...)directly - Keep tests readable
- Avoid complex setup
For most use cases, async testing adds very little overhead.
Why This Structure Works
Each layer has a clear responsibility:
| Layer | Purpose | Speed | Debuggability |
|---|---|---|---|
| Unit tests | Validate node logic | Fast | High |
| Graph tests | Validate system behavior | Medium | Medium |
| Failure tests | Validate robustness | Fast | High |
Because concerns are separated:
- Failures are easier to diagnose
- Tests remain stable as the system grows
- You avoid brittle, over-coupled tests
What About LLMs?
In this project, all tests use deterministic fake models.
That’s intentional.
If your tests depend on real LLM outputs:
- They become flaky
- They slow down
- They fail for the wrong reasons
Instead:
- Use pytest for correctness
- Use evaluation (LangSmith, etc.) for quality
We’ll cover that in the next post.
The Real Takeaway
If all your tests run the full graph, you don’t have a test suite.
You have a bottleneck.
A well-structured LangGraph test suite:
- Tests nodes in isolation
- Tests behavior at the graph level
- Tests failure paths explicitly
That’s what gives you confidence to evolve the system without breaking it.
What’s Next
In the next post, we’ll look at:
- How to evaluate LangGraph workflows properly
- Using datasets instead of ad-hoc prompts
- Scoring outputs with LangSmith
Because once your system is correct…
The next challenge is making sure it’s actually good.
Final Thought
Most AI systems fail quietly.
Not because the model is bad — but because no one tested how the system behaves when things go wrong.
Structure your tests properly, and you’ll catch those failures before your users do.